THE SHORT ANSWER
The key idea, first.
A water cycle model represents selected places where water is stored and routes by which it moves. A water play table can make flow and collection tangible, but visible circulating liquid does not demonstrate evaporation, cloud formation or the full natural cycle. Combine direct observations with a clearly labelled diagram and separate evidence for changes of state, underground movement and the energy that drives them.
- Identify water storage and movement as different parts of the water cycle.
- Separate processes visible in a water play installation from processes explained by a diagram.
- Describe evaporation, condensation and groundwater without treating a model as a complete copy of Earth.
WATCH & NOTICE
Look closely at the demonstration.
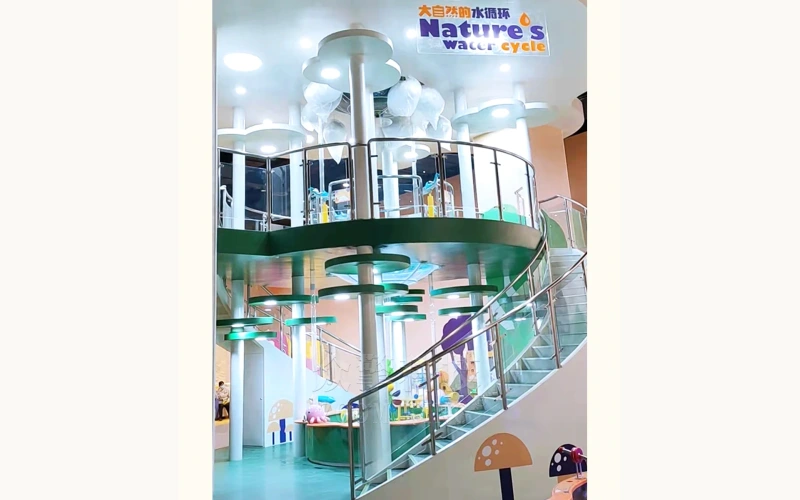
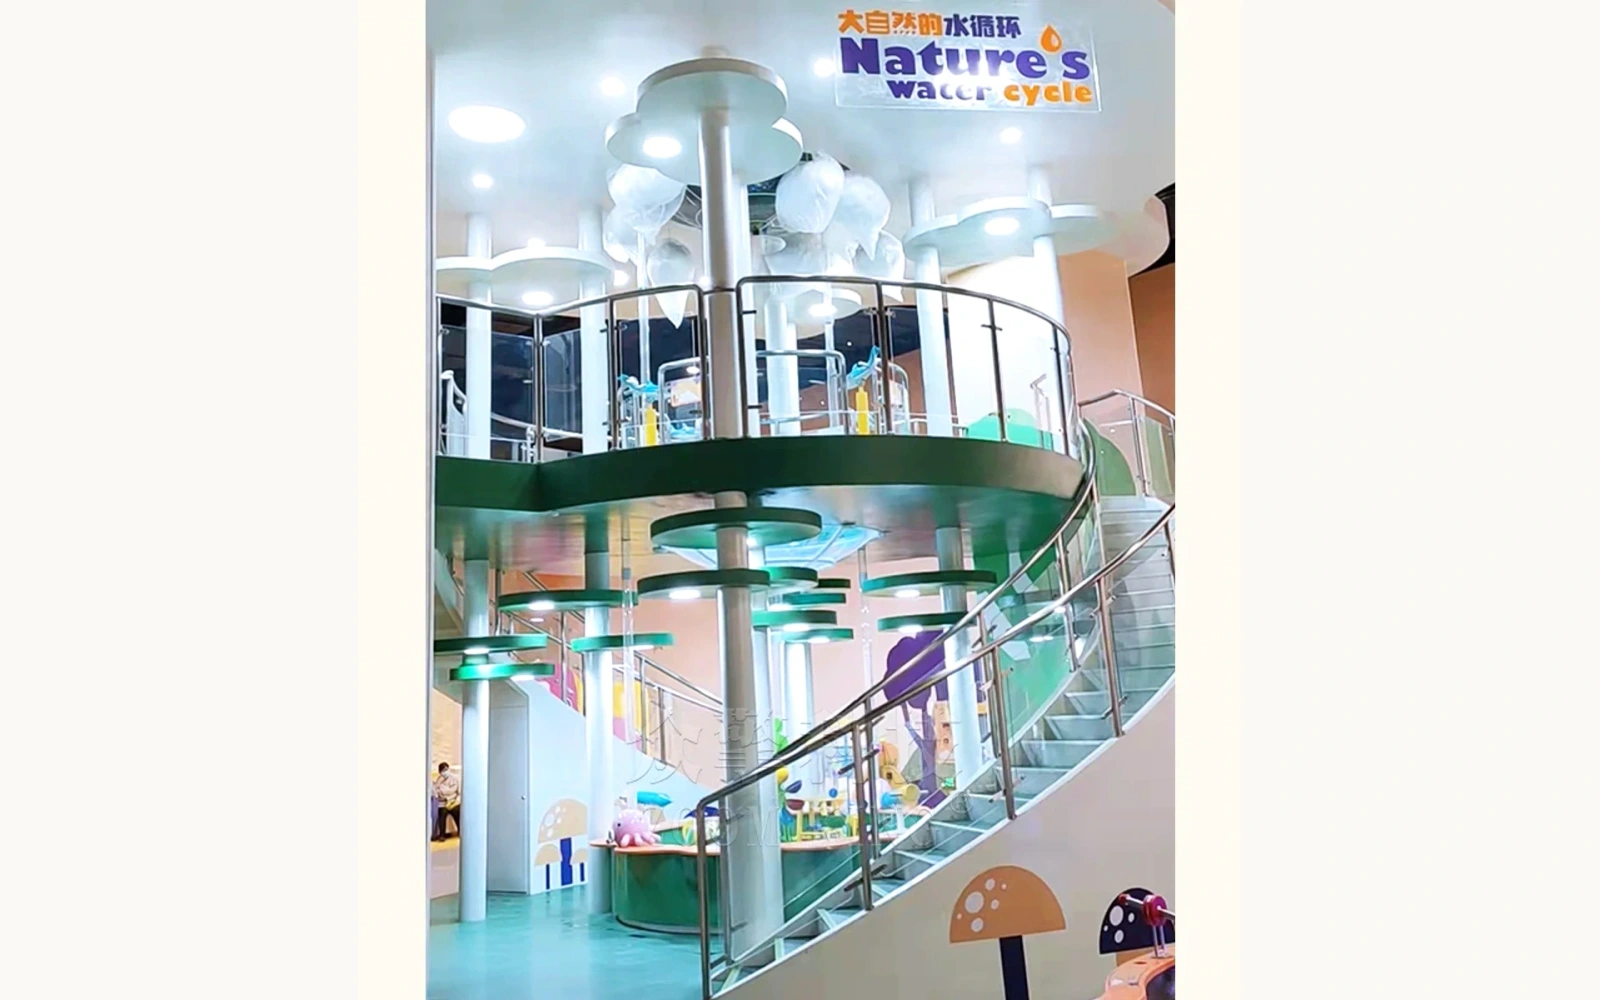
Watch the 25-second silent tour as a reference for a physical water play installation and its viewing positions.
Find the collection area
Locate the lower shared basin and identify where visible water gathers.
Trace visible movement
Follow water in the clear tubes and other visible flow paths, noting where the camera provides a useful view.
Compare viewpoints
Notice the multilevel arrangement and how different positions could help families compare parts of the installation.
About this video reference
The footage shows a water play installation and visible liquid flow. It does not establish evaporation, condensation, cloud formation, infiltration or a complete atmospheric water cycle in the exhibit.
01 / EXPLAINING THE IDEA
A model selects part of a much larger system
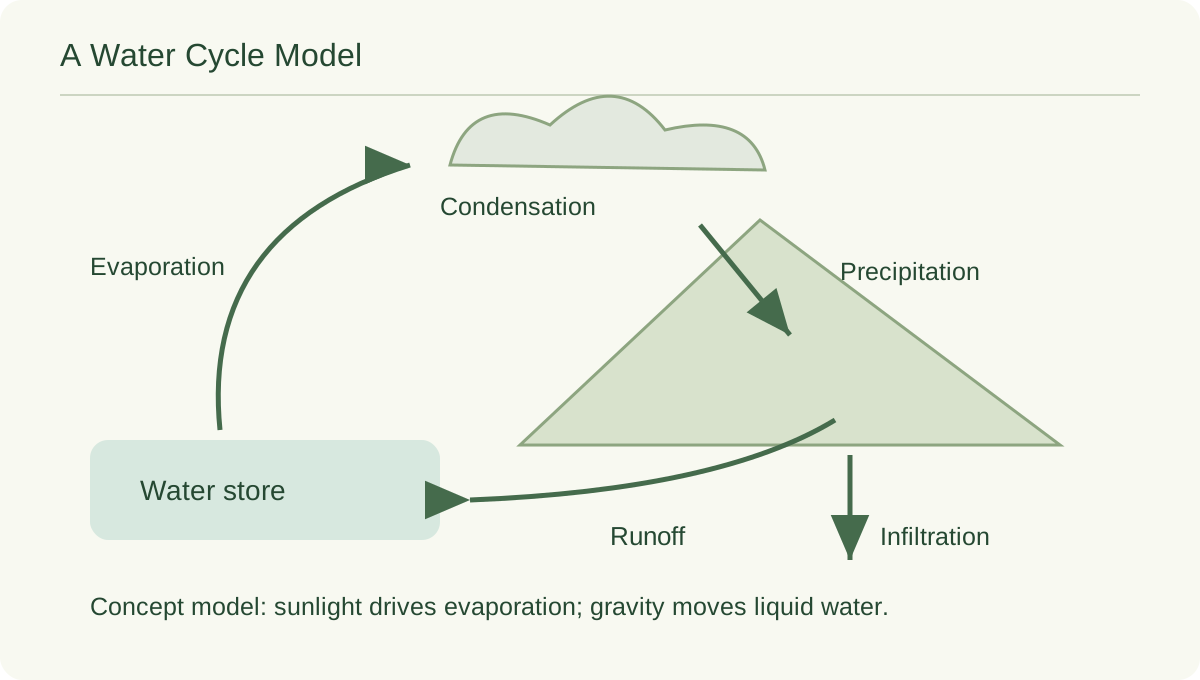
The natural water cycle includes water stored in the atmosphere, at the surface and underground, with movement between those stores. USGS describes both the stores and the transfers. It is a network of possible routes, not a requirement for every water molecule to complete the same short sequence.
A water cycle model makes selected relationships easier to investigate. Ask what the model actually includes. A basin can help learners think about collection and a visible channel can help them follow a route. Label what is missing.[1]
02 / EXPLAINING THE IDEA
Start with the liquid water you can follow
The accompanying video tours a multilevel installation with a lower basin, transparent tubes and moving water. Its product reference also identifies water wheels. Ask visitors to identify moving water and gathering water, then explain the difference.
To connect the activity with a landscape, introduce runoff as water moving over the ground and streamflow as movement in a river or stream. Gravity helps drive downhill flow. The comparison is about a route through the system, not a claim that each pipe or wheel corresponds to a natural feature.[1]
03 / EXPLAINING THE IDEA
Add the route from liquid water to the atmosphere
Evaporation changes liquid water into water vapor. It can occur without boiling: water at an ordinary surface can enter the air gradually. USGS explains evaporation as a transfer from Earth's surface to the atmosphere and connects it with energy. In nature, sunlight supplies much of the energy involved in the water cycle.
An upward stream in a clear tube is still liquid transport, not evaporation. Use a separate diagram arrow for the change to vapor and label the energy input. Investigating evaporation requires a separate observation that can detect water loss under recorded conditions.[2]
04 / EXPLAINING THE IDEA
Explain clouds with a change of state
Condensation is the change from water vapor to liquid water. USGS uses moisture forming on a cold glass as a familiar example. Water vapor is usually invisible; a cloud's visible appearance involves tiny droplets or ice particles. Atmospheric cooling can support condensation, and precipitation returns water from clouds to the surface.
The video does not show those atmospheric transformations. Add a labelled cloud diagram or separate condensation demonstration. Ask learners to name the water's state at each step; splashing or liquid falling from a height does not prove a cloud-forming process.[3]
05 / EXPLAINING THE IDEA
Include the route beneath the ground
Some surface water enters the ground, where it can move through pores and fractures. USGS compares most groundwater with water in a sponge rather than a system of open underground rivers. Groundwater can eventually discharge into rivers, springs or the ocean. This introduces storage and movement that a surface view does not reveal.
Draw a landscape cutaway and add another possible route for rainfall. Label it conceptual, not a measured map of the museum site. Ask whether water must immediately return to the sea. Recognize branching routes and different periods of storage.[4]
06 / EXPLAINING THE IDEA
Use a comparison chart to keep the model honest
Invite learners to sort claims into three groups: visible here, represented by analogy, and explained using another source. Let them challenge an analogy that feels unclear. A tube can reveal flowing liquid, for example, while an arrow on a diagram may represent an invisible atmospheric transfer. Both are useful when their roles are explicit.
The chart is a teaching aid, not an inventory of every configuration. Revise it for separately documented processes. Invite students to explain the model's limits in their own words.
| Idea | What this reference offers | What needs another explanation |
|---|---|---|
| Collection and visible flow | Basin and visible liquid pathways | How these compare with a landscape |
| Evaporation and condensation | A prompt for discussion | Phase changes and atmospheric conditions |
| Groundwater | A reason to ask what lies below | Pores, fractures and subsurface pathways |
07 / EXPLAINING THE IDEA
Build a short learning sequence around one question
Begin with a prediction: where will this water go next? Have pairs follow one route and mark where the view becomes uncertain. Add processes from the wider cycle using a different line style for a diagrammed change of state.
End by asking each learner to identify one useful analogy and one limitation. For a museum project brief, state which processes visitors will observe physically, which will be explained graphically and which need a facilitated activity. That makes the learning intention reviewable without presenting water play as a complete reproduction of Earth's water cycle.
Common questions.
Does a water play installation demonstrate the whole water cycle?
Only if each claimed process is separately present and documented. The local reference shows liquid flow and collection. Atmospheric phase changes and groundwater require additional explanation or a separate demonstration.
Is liquid moving upward through a tube evaporation?
No. Evaporation changes liquid water into gaseous water vapor. Liquid moved to a higher position remains liquid, even though the direction resembles an upward arrow on a water cycle diagram.
Must the water cycle begin in the ocean?
No. It is a connected system with many stores and routes. A lesson can start at a river, cloud, plant or groundwater store, provided the connections are explained accurately.
SCIENCE & FURTHER READING
Follow the sources.
Read the original scientific explanations and teaching resources behind this article.
- USGS Water Science School — Water cycle
Water stores, transfers, gravity, solar energy, runoff and the wider connected system.
- USGS Water Science School — Evaporation and the Water Cycle
Liquid-to-vapor transfer and evaporation without requiring boiling. The page=1 URL was the readable primary page during research.
- USGS Water Science School — Condensation and the Water Cycle
Vapor-to-liquid change, cold-surface examples, cloud droplets and precipitation.
- USGS Water Science School — Groundwater Flow and the Water Cycle
Groundwater in pore spaces and fractures, and return flow to surface water.
Editorial: Exhibit Engineers science & exhibit team. Scientific references are cited for the explanations; product configuration details follow the linked exhibit records.